React deployment AWS SSL(https) and Subdomain
React deployment AWS SSL(https) and Subdomain
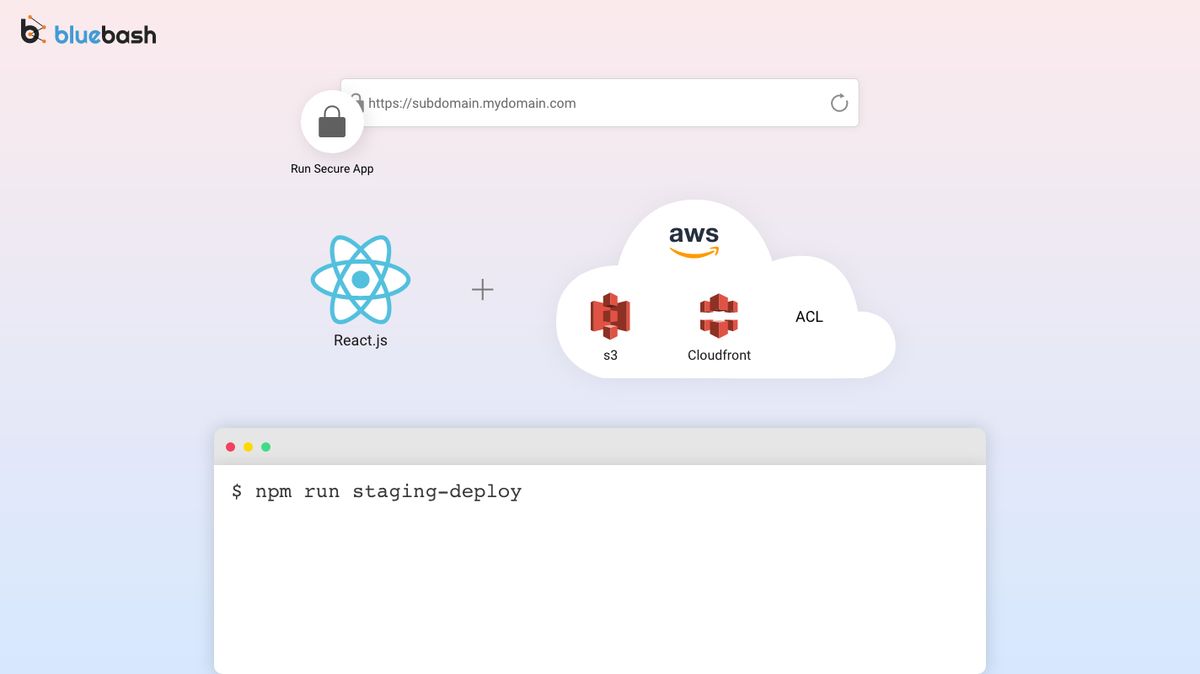
React community is going wide day by day. In these day's everybody knows about React and I think, we can directly start on How to deploy React app free of cost with SSL.
There are many platform where we can deploy React app very quickly. You can see detail here (Facebook React deployment platforms) . But React AWS S3 static hosting is most popular. Here we will explain all deployment related steps and main key points.
1) Configure the AWS CLI
2) Create S3 Bucket
3) Configure AWS CloudFront with S3 bucket
4) Integrate SSL on you Cloudfront
5) Point your domain to Croudfront url
6) Push your production build from Local to S3 bucket using EB CLI
Configure the AWS CLI:-
Follow this link for quick setup https://bluebash.co/blog/configure-the-aws-cli/
Create S3 Bucket:-
1) Go to AWS console and create one bucket.
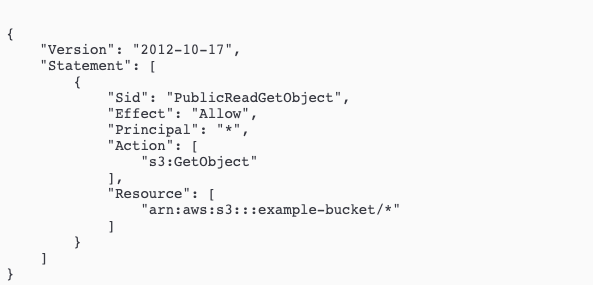
2) Now we need to set bucket permissions. Go to permission tab and add following text.
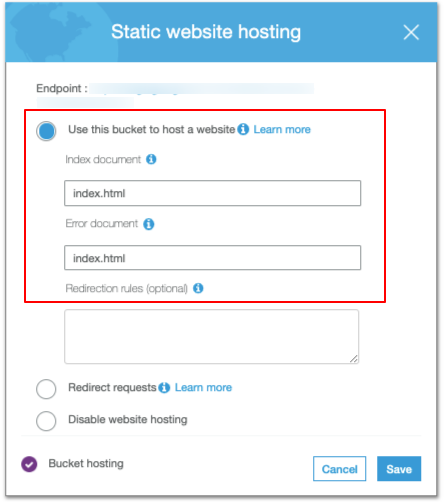
3) Enable static hosting under properties tab.
Configure AWS CloudFront with S3 bucket:-
Now we are good and ready to configure CloudFront with S3 bucket.
1) Go to AWS services and search Cloud Front.
2) Create new distribution
3) Select bucket name in Origin Domain Name


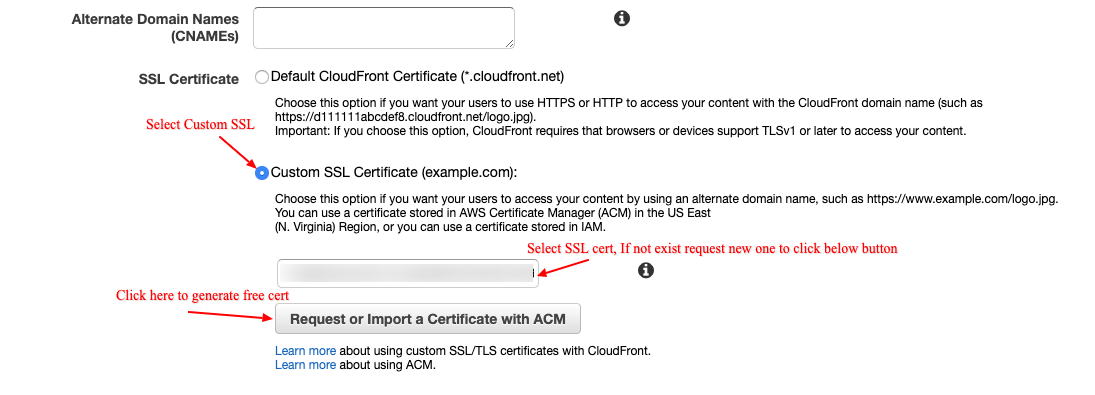
Integrate SSL on your Cloudfront distribution:-
On same form you need to do following changes for SSL. AWS provide free ACM ssl service.
Point your domain to Cloudfront url:-
Now your distribution is almost ready. Now you just need to point your domain to cloudfront distribution.
1) Go to you DNS provider(In my case I am handling DNS on Digital Ocean)
2) Create one CNAME record.
3) Wait for few minutes. Some time it takes hours but normally it will reflect in 15-20 minutes

Push your production build from Local to S3 bucket using EB CLI:-
Now every thing is done now you just need to push your build from local to production. If you remember in first step we configure AWS CLI on our system. You now we will run one command to push you code local to production.
1) Install npm-run-all npm in your project.
Run this command on console under you code directory. $ npm install npm-run-all--save
2) Add deploy script in package.json. Here invalidate is for to invalidate previous deployment. So new deploy can distribute quickly.

Now you can deploy your code simply to run following command.
$npm run staging-deploy
Hope you enjoy this tutorial. Feel free to leave a comment for any support :)
Thanks.


