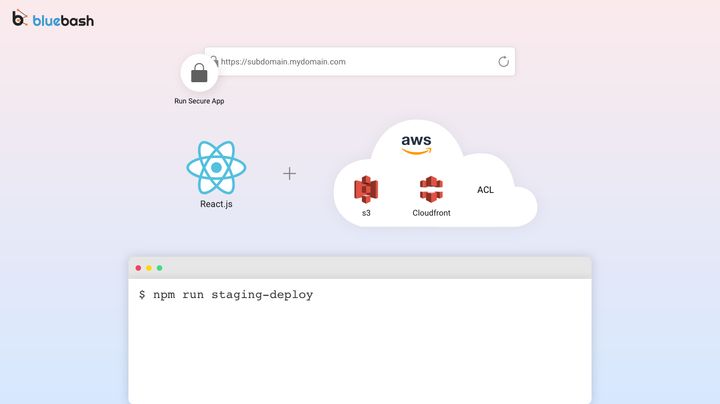
Configure the AWS CLI
First we need to understand why we need AWS CLI.
We can control AWS all services from our system and no need to login web AWS console.
Click here to see all commands.
There are two main step to setup AWS CLI on personal system.
1) Install AWS CLI
2) Get Access Key and Secret Token
2) Create AWS profile
Install AWS CLI
This is very simple step and I am not going in detail. You can follow AWS official doc to complete this step . click here.
Get Access Key and Secret Token
Now we need to create one valid AWS profile on our system, So AWS can authenticate our system and we can perform any AWS action through command line from our system.
For this we need Access Key and Secret Token. AWS console UI is bit complex for new users. You will get Access Key and Secret Token from two different places.
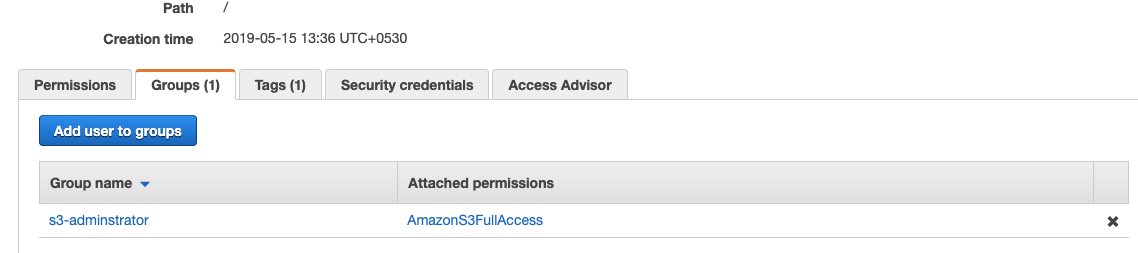
a) Access Key:- Login with AWS console. Click on user name in top bar and click on My Security Credentials and create new keys or use existing one if any.

b) Secret token:- Go to IAM management or click here to access directly. Create a new user and add required groups in under groups section. Now you can get secret token from security credentials tab.
Create AWS profile
Now we have both Access Key and Secret token and we are only one step away.
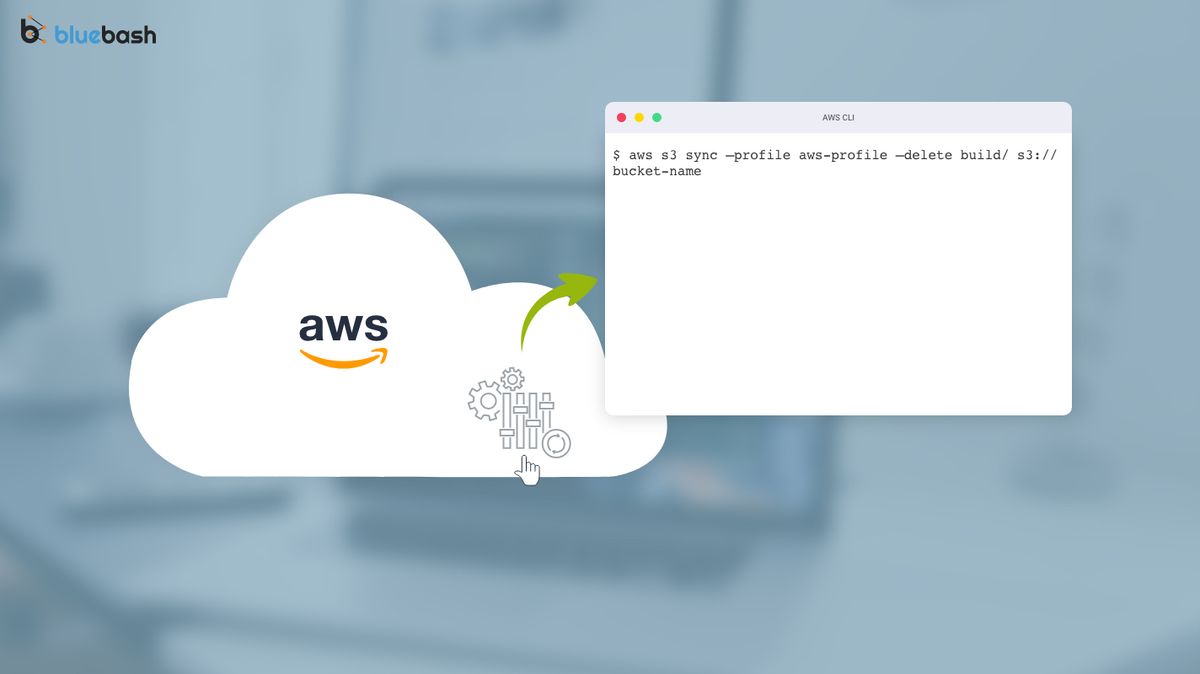
Open your terminal and type this command.
AWS Configure [--profile profile-name]
Here profile-name is optional but I will suggest you to mention profile-name. Because in future may be we need to configure multiple account. So we can easily differentiate.

Now we are done with configuration :).
You can list profile using:- $ aws configure list --profile profile-name .